
How to make actually good coffee for not a lot of money
An opinionated guide on making good hot water + beans juice, without milks or sugars (v60 filter coffee)
I have a very elaborate coffee-making setup, and I can’t honestly recommend anybody, unless you’re really into coffee, spending the same amount of money that I have on that setup. However, I can actually tell you how to make significantly better coffee than what you’re probably used to drinking today. This is the guide for that.
What is good coffee?
Well, this should go without saying, but good coffee actually tastes good, meaning that for you it is a thing that you enjoy. I argue that you don’t need to learn to drink coffee. That is what people say when they are used to drinking bad coffee.
Good coffee is delicious. It is something that you enjoy drinking, and there’s probably some base in there of coffee beans, ground coffee beans that have interacted with water somehow, but that really is all there is to it, and I don’t think we need to be more precious about it.
Good coffee is simply a coffee-related drink you enjoy drinking.
But by that logic, we can really make any kind of coffee-based drink good. You just add a bunch of sugar, fat, cream, or syrups to the mix, and you get something that is essentially always good. It can be easily adjusted to whomever is drinking that thing. In fact, you could start a whole coffee chain around this and call it Starbucks.
But for the sake of this article, let’s talk about how to make pure coffee. That is: water and ground coffee beans that somehow interact together and make something where one could say, “Hey, this is actually very tasty. Without necessarily even adding milk, sugar or cream.
The specific variety of coffee we’re making today is called "v60 pour-over”. Which is ground coffee in a filter on top of a cup, over which you pour boiling water. A bit by bit. It takes about 2-3 minutes to make this (very good) coffee.
Shopping list
Fresh beans (see below)
A decent grinder. The Ode Brew Grinder is great for filter coffee $399, but you can get a great grinder from Baratza for half that price
Any v60 dripper ~$15
Any kettle to boil water, but try to get one with a pour-over spout like this fancy one. I bought one years ago on Amazon for $30 and it still works great. You’re going to boil the water, so no need for fancy temperature management.
v60 filters $5 for 40
A pour-over scale with a timer. Amazon sells a bunch of simple ones. Fellow and Acaia sell expensive fancy ones for 10x the price (I have the Tally Pro $199 and genuinely find it amazing)
a small spoon (any)
Beans
As you know, coffee beans are roasted.
Now, what you might not know is that after roasting, you should use coffee beans within 3 to 14 days. After that time, the coffee beans lose CO2 pressure, volatile aromatics, their oil integrity, and structural integrity. All of this means that over time, coffee roasted coffee becomes more bitter, more ashy, and starts to taste more like generic coffee.
Therefore: Always use freshly roasted beans
It’s surprisingly easy nowadays to get great freshly roasted beans. Just look for a local coffee roaster. Google is your friend here, and likely on their website or in the shop of said roaster, you can buy bags of coffee beans. I strongly recommend you buy bags of whole beans, not pre-ground, because ground coffee loses its flavor more quickly, and grinding is an important part of making good coffee.
Coffee comes from all over the world, and individual places in the world have their own types of coffee. You certainly can taste differences between different coffee beans around the world, but also between different roasters and how they decide to roast whatever coffee they might have or what kind of mix of beans they might use. Occasionally, a roaster might use beans from a single place. Then they call this a single origin roast/bean. These tend to be more expensive and have more pronounced flavors.
But if you’re making your first good coffee in your life, don’t pay too much attention to all of this. Just choose any bag that you like that is fresh. You can ask the roaster as well for advice, and look at the flavor notes printed on the bag. For this particular instance, we are going to make great filter coffee. If the roaster recommends a particular kind of bean for filter coffee, choose that.
Grinder
So a grinder takes your roasted beans and grinds them into ground coffee.
Now you might think that this is not a particularly scientific or otherwise sophisticated step in the coffee-making process, but you couldn’t be further from the truth if you thought that.
Because the reality is that other than the quality of the beans, the quality of your grinder is what largely dictates how your coffee is going to taste.
Grinders grind coffee, not just in larger or smaller particles, which decides how fast the water is going to run through it, and therefore how much of the flavor is being extracted from the coffee, but also what the ratio is of the various sizes of particles of ground coffee.
And so coffee nerds like myself spent an incredible amount of time looking at, considering, comparing, and ultimately spending an insane amount of money on coffee grinders. For this reason, espresso is also so hard to get into because for pour-over coffee like we are making today, you don’t need to grind the coffee beans very finely. However, for espresso, you want to grind coffee beans very, very finely, very precisely, and with a very particular consistency and ratio between sizes of particles in the coffee ground.
So what you do with the grinder is that you throw in the amount of coffee that you want to grind, and then you adjust the grinder to the size that you want the coffee to be. You use the coffee grounds to make coffee. Look at how the coffee is extracted—for example, how long it takes, how it looks, how it smells, and how it tastes. Then adjust your grinder for subsequent brewing sessions so that over time you fine-tune your grinder to the specific beans that you have.
Now, the challenge here is that as the beans age, you might want to grind them more finely over time. Adjusting your grinder to specific beans is an endless push-pull process. Ultimately eluding you from that perfectly extracted coffee that tastes like nothing you ever drank before.
For v60 coffee, you want a “medium” grind. Now what that means is that on most grinders it’s somewhere in the middle. But in reality you will need to dial it in over time depending on the time it takes for your coffee to extract.
Making v60
Now let’s start making some real coffee. In this case, we’re using the technique called V60, which simply refers to the type of dripper and filter that we’re using for this process.
There are many different types of recipes for V60, which usually refers to both the ratio of ground coffee to water as well as the timings of brewing this kind of coffee. What I’m going to teach you today is a really simple, straightforward one that you can adjust over time, depending on how you find things to work for you.
We’re going to make 1 cup of about 225g of coffee. A good cup! We’re using the ratio 1:15 of coffee beans to water. You can adjust accordingly.
Prep
Boil ample water in the kettle.
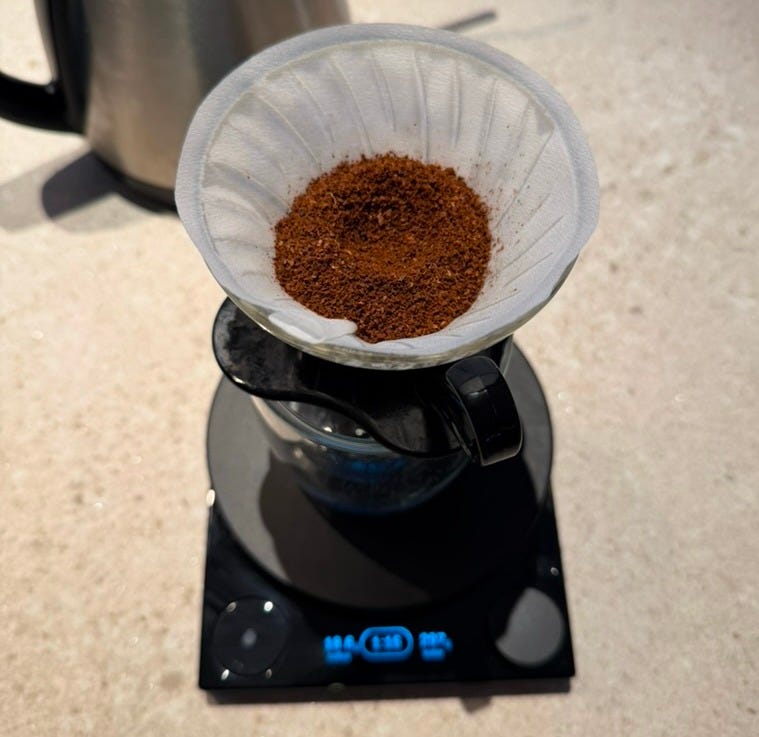
Measure ~15g of coffee beans and grind them on the recommended setting for v60 in your grinder (check the manual!). If you don’t know, just put it somewhere on the middle setting and see how your timings are
Put the filter in the dripper and make it all wet. Make sure there’s no remaining water that goes into your cup
Put the dripper on your cup, and that on the scale. If you have a fancy scale, now is the time to use its functions. If you have a simple one, do nothing with it.
Put the ground coffee into the filter and make a little volcano-hole with your finger on the top of the pile. So you have something to aim for with your kettle in a bit
Tare the scale. Set the timer to zero.
Brewing
00:00 Start the timer. Pour about 50g of water slowly in circular motion on top of the coffee.
Pickup the dripper and swirl it around a bit without spilling coffee. The goal here is to mix the coffee grains better with the water, so the grains at the edges are used as much as the ones in the center. This should take you to about 30 seconds
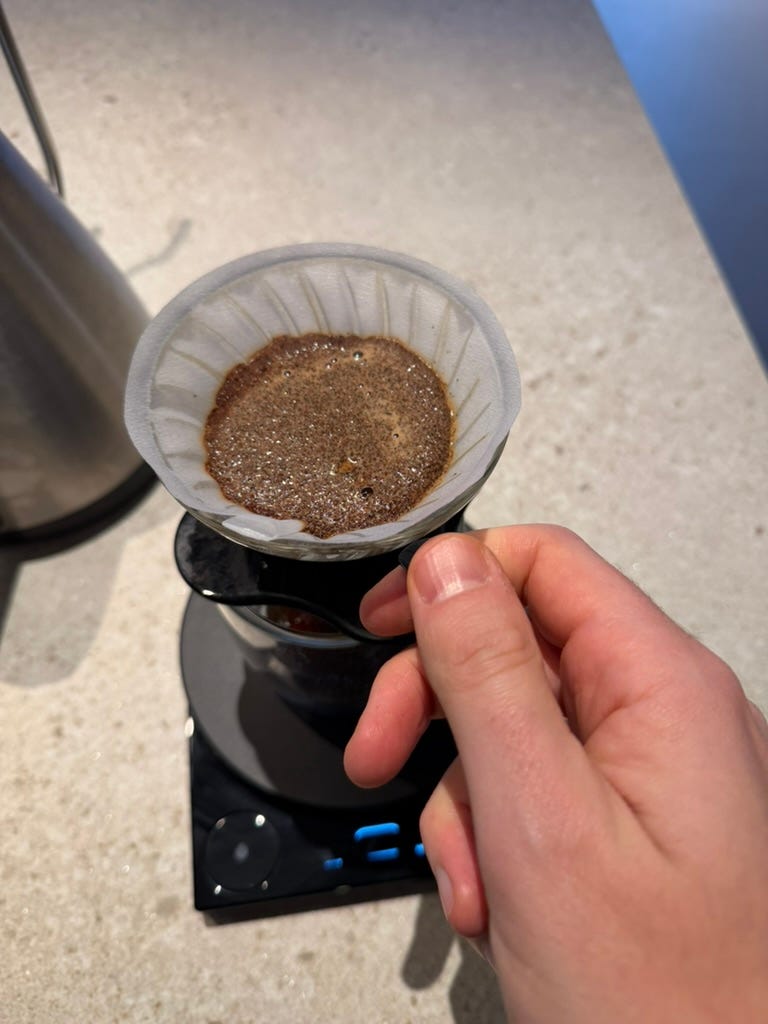
00:30 Pour in the next 50g of water. Use the spoon to agitate the coffee-water mixture a bit. Then just wait a bit until your timer is at 1 minute
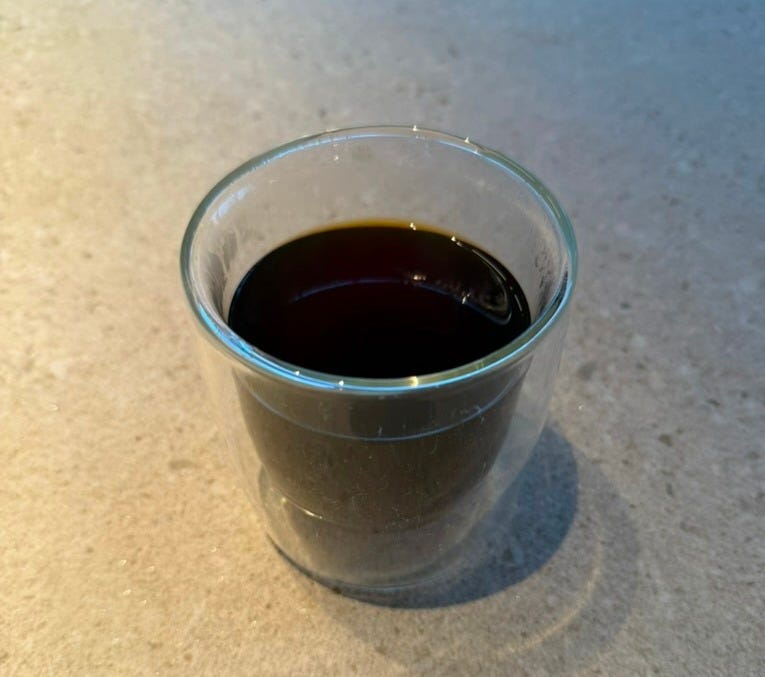
01:00 From now until you’ve hit 225g of water, pour in water in a circular motion as the dripper allows you, i.e. the water doesn’t spill over. After about 2-3 minutes you should be done, the dripper no longer dripping, and your coffee done!
Drink the coffee!
Tuning from good to great
The coffee should taste good. Not bitter, not overly acidic. But this also depends a lot on the beans, as we’ve discussed earlier. Beans make or break the coffee more than anything else. Fresh beans first. And if you’re able to hit the timings with fresh beans adn still don’t like the flavor - try other beans. From another country, another flavor profile, and another roaster. You will find there are large differences between them.
In particular try light, medium and dark roastings. My preference goes to medium roasted beans, but this is purely a matter of taste.
If you find that the timings are very hard to hit, because the water is not filtering through fast enough - grind more coarsely. On most grinders this means turning to a higher number (higher number = bigger grains).
If you find that the water flows through within mere seconds - grind more finely.
What’s next
Once you have a coffee you enjoy, you can try other types of filter coffee. There are many similar types of filter coffee, but worth experimenting with is Aeropress. A bit faster and easier, a slightly different taste. Still cheap and your current grinder will work just fine.
Espresso is a whole other world. To make great espresso, you need some serious commitment in time, space and money. But that’s for another time.
would a $50 work grinder from Amazon work for me? or the difference in taste would be significant?